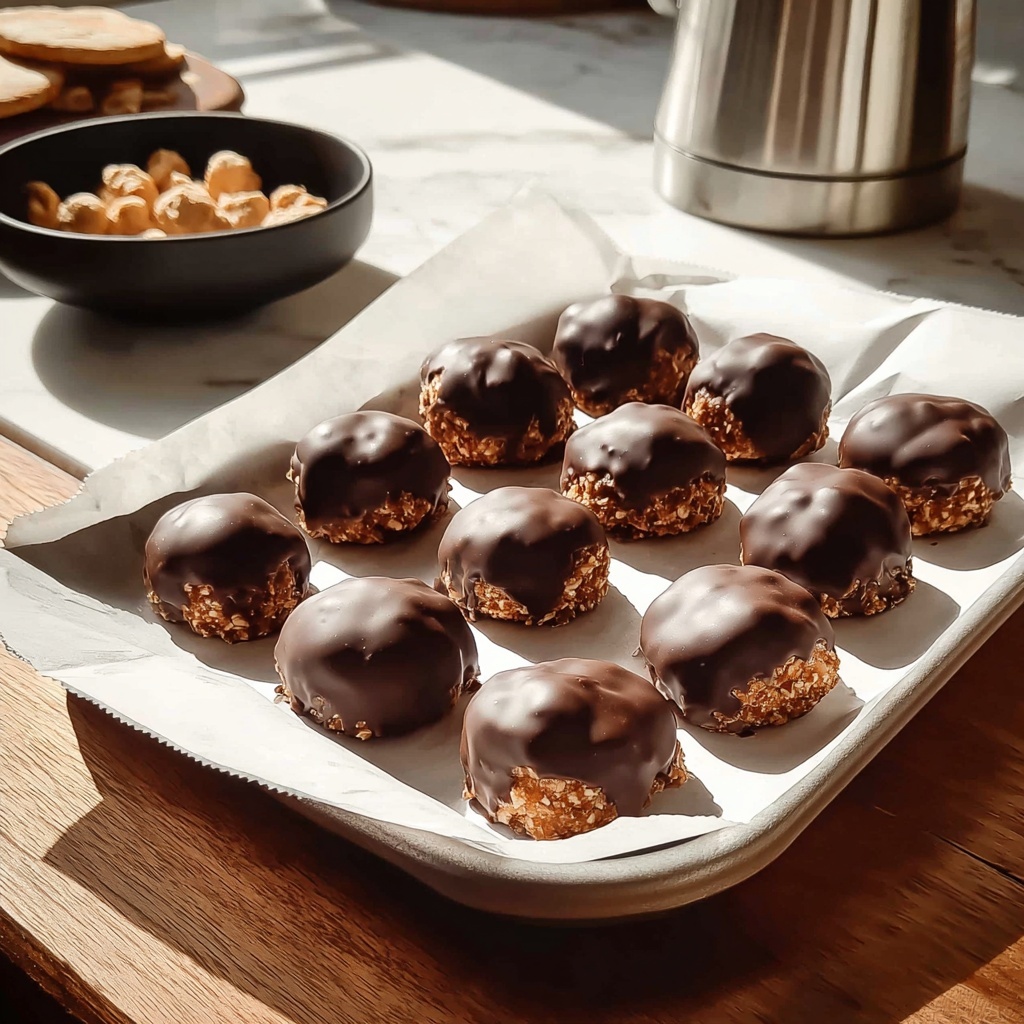
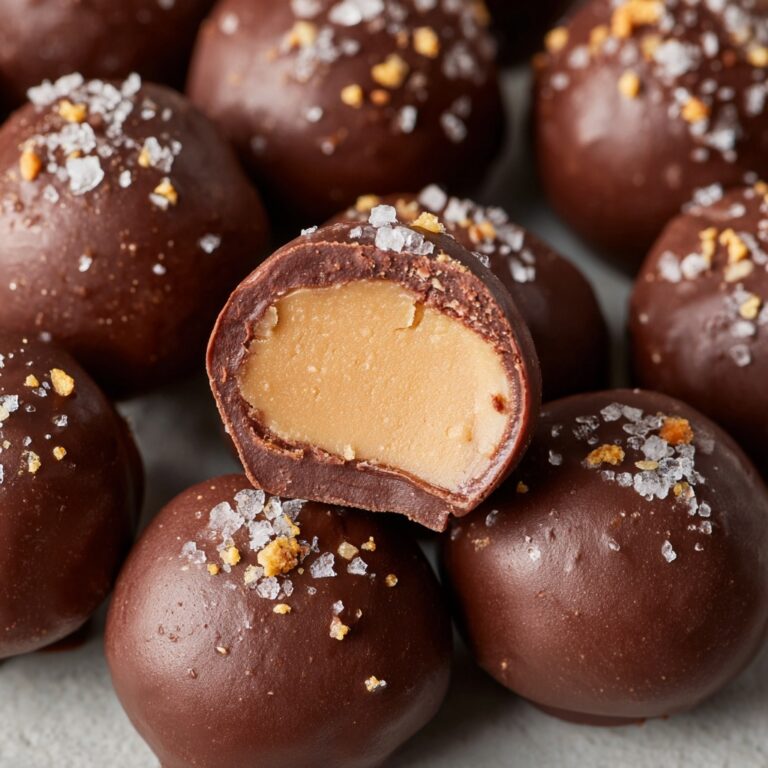
If you’re on the hunt for a sweet, crunchy, and utterly irresistible treat, look no further than this Butterfinger Balls Recipe. These little bites pack a punch of creamy peanut butter, buttery richness, and that signature Butterfinger bar crunch all wrapped in a smooth chocolate coating. Whether you’re making them for a party, a special snack, or a homemade gift, these Butterfinger Balls deliver just the right balance of texture and flavor that will have everyone asking for seconds. They are simple to whip up, fun to customize, and perfect for satisfying those sweet cravings with a nostalgic twist.
Ingredients You’ll Need
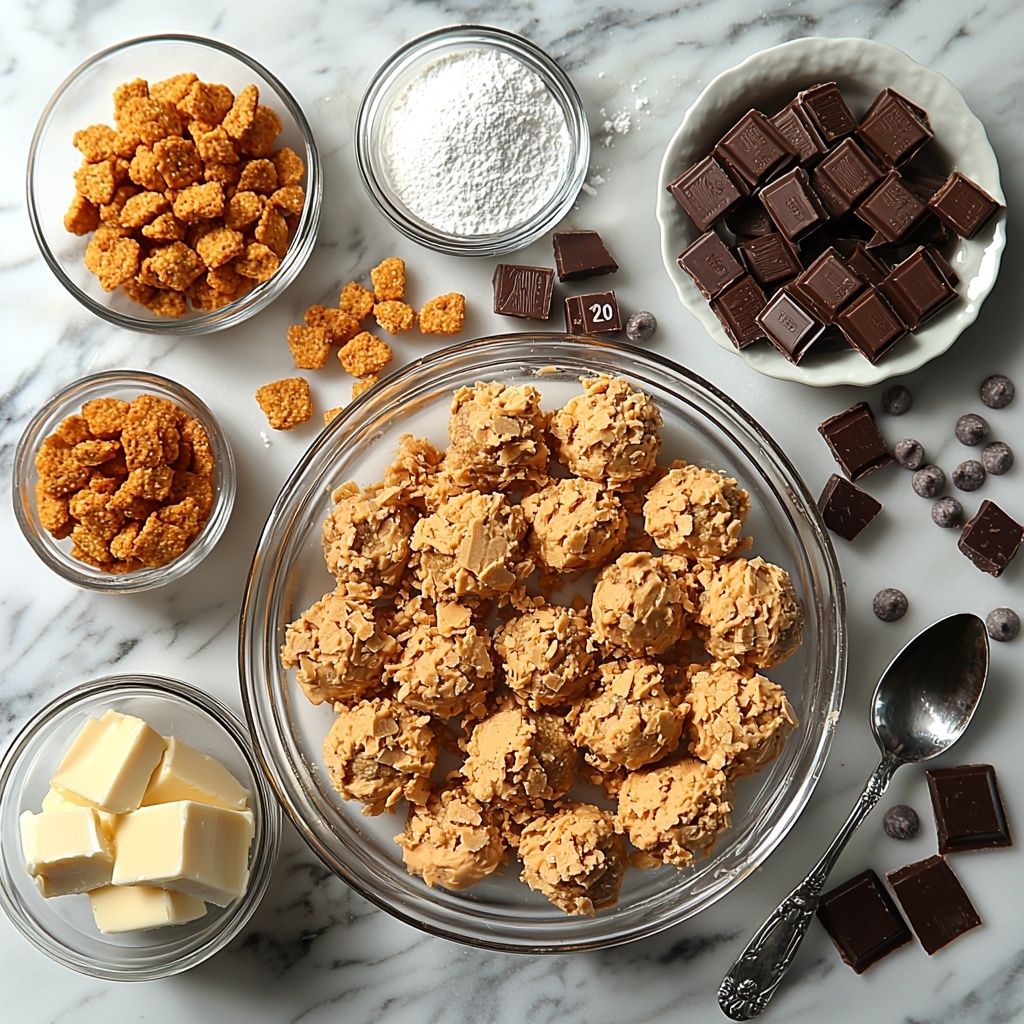
Getting your Butterfinger Balls just right starts with a handful of simple, thoughtfully chosen ingredients. Each component plays a key role, whether it’s building the creamy base, adding that perfect crunch, or giving the final product a shiny chocolate coat.
- Unsalted butter (4 tablespoons, softened): Adds creamy richness and helps bind the peanut butter mixture smoothly.
- Vanilla extract (1 teaspoon): Provides a warm, sweet aroma that elevates all the flavors.
- Peanut butter (1 cup, preferably Jif or Skippy): The star ingredient that delivers creaminess and a salty-sweet punch.
- Powdered sugar (1 cup): Sweetens and helps firm up the texture for rolling into balls.
- Graham cracker crumbs (¾ cup): Adds subtle crunch and a toasty note that pairs beautifully with peanut butter.
- Crushed Butterfinger bars (½ cup): The signature crunch and flavor that makes these treats unforgettable.
- Chocolate bark or chocolate chips (8 oz, for dipping): Creates a luscious chocolate coating to encase the candies.
- Optional toppings (crushed candy, sprinkles, flaky salt): Fun finishing touches to personalize your Butterfinger Balls.
How to Make Butterfinger Balls Recipe
Step 1: Blend the Base
Begin by combining the creamy peanut butter and softened unsalted butter in a mixing bowl. Use a hand mixer to beat them together until perfectly smooth and well blended. This silky base will give your Butterfinger Balls a rich and luscious foundation that melts in your mouth.
Step 2: Add Flavor and Structure
Next, stir in the vanilla extract. This little addition brings a hint of warmth and depth to the overall flavor. Gradually sift in the powdered sugar, mixing thoroughly to incorporate the sweetness evenly without any lumps—this step firms up your mixture for the next part.
Step 3: Fold in Crunchy Bits
Now it’s time for texture. Gently fold the graham cracker crumbs and crushed Butterfinger bars into the peanut butter mixture using a spatula or wooden spoon. This adds divine crunch and that unmistakable Butterfinger flavor that sets this recipe apart. Be sure to mix until everything is evenly distributed for every bite to have that perfect balance.
Step 4: Roll and Chill
Once your mixture is ready, scoop out about 1 to 1½ tablespoons at a time and roll them into neat little balls. Place these on a baking sheet lined with parchment paper. Pop the tray into the freezer for 30 minutes to solidify the balls, making them easier to dip later.
Step 5: Melt the Chocolate
While the balls chill, melt the chocolate bark or chips in a microwave-safe bowl. Heat on 50% power in 30-second bursts, stirring between intervals to ensure a smooth, glossy chocolate perfect for dipping.
Step 6: Dip and Decorate
Once your Butterfinger balls are chilled and firm, dip each one into the melted chocolate, turning to coat completely and letting the excess drip off. Lay them back on a clean tray and quickly add your favorite toppings if desired—think crushed candy or a sprinkle of flaky salt to enhance every flavor note.
Step 7: Let Set
Finally, allow the chocolate coating to harden. You can leave the tray at room temperature or place it in the fridge to speed up the process. Once set, these Butterfinger Balls are ready to share and savor.
How to Serve Butterfinger Balls Recipe
Garnishes
Adding a little extra pizzazz on top makes these treats even more festive and inviting. Consider using crushed peanuts, colorful sprinkles, or a pinch of flaky sea salt to contrast the sweetness and highlight the buttery, crunchy interior.
Side Dishes
Butterfinger Balls shine as a standout dessert on their own but pairing them with a scoop of vanilla ice cream or a cup of rich, hot coffee can truly elevate the experience. Their richness pairs beautifully with something cool or slightly bitter.
Creative Ways to Present
For gatherings, try arranging them in cupcake liners for easy serving or presenting them on a decorative platter alongside other bite-sized sweets. Wrapping a few in clear cellophane tied with a ribbon also makes for a charming homemade gift.
Make Ahead and Storage
Storing Leftovers
Store any leftover Butterfinger Balls in an airtight container in the refrigerator. They will stay fresh and delicious for up to a week, maintaining that perfect texture and flavor combination.
Freezing
If you want to keep them longer, Butterfinger Balls freeze wonderfully. Place them in a freezer-safe container with parchment between layers to prevent sticking. When properly stored, they’ll keep well for up to three months.
Reheating
These treats are best enjoyed cold, but if you prefer softer chocolate, simply let them sit at room temperature for 10 minutes before eating. Avoid microwaving as it can cause the chocolate to bloom or the peanut butter center to soften too much.
FAQs
Can I use crunchy peanut butter for this Butterfinger Balls Recipe?
Yes, you can use crunchy peanut butter if you like added texture, but the graham cracker crumbs and crushed Butterfinger bars already provide great crunch. Creamy peanut butter gives a smoother overall consistency.
Do I have to use Butterfinger bars, or can I substitute with other candy?
Butterfinger bars are the signature ingredient for this recipe’s unique flavor. However, if unavailable, crushed Heath bars or similar crispy peanut butter candy bars can be a tasty substitute that still adds crunch.
Is it necessary to chill the balls before dipping them in chocolate?
Chilling the balls firms them up so they hold their shape when dipped. Skipping this step might make the balls too soft and tricky to cover in chocolate smoothly.
Can I make these Butterfinger Balls without a mixer?
Absolutely! While a mixer helps achieve a smoother base quickly, you can stir the ingredients by hand with a sturdy spoon. Just make sure the butter is very soft to make mixing easier.
How long do Butterfinger Balls keep at room temperature?
Because of the peanut butter and dairy in the butter, it’s best to keep these treats refrigerated and only leave them out for about one to two hours before serving to maintain freshness and food safety.
Final Thoughts
This Butterfinger Balls Recipe is truly one of those treats you’ll want to make again and again. It’s a fun, easy way to bring that classic Butterfinger flavor into a delightful homemade candy form that’s perfect for any occasion. Give it a try—you’ll soon find yourself hooked on these sweet, crunchy, chocolate-covered bites that are bound to make your dessert lineup shine.
Print
Butterfinger Balls Recipe
- Prep Time: 15 minutes
- Cook Time: 0 minutes
- Total Time: 15 minutes
- Yield: 12 balls
- Category: Dessert
- Method: No-Cook
- Cuisine: American
Description
These Butterfinger Balls are a delightful no-bake treat combining creamy peanut butter, crunchy Butterfinger candy, and rich chocolate coating. Perfect as a sweet snack or party dessert, they are easy to make and wonderfully indulgent with a satisfying crunch from graham cracker crumbs and Butterfinger bits.
Ingredients
Base Ingredients
- 4 tablespoons unsalted butter (softened)
- 1 teaspoon vanilla extract
- 1 cup peanut butter (preferably Jif or Skippy)
- 1 cup powdered sugar
- ¾ cup graham cracker crumbs
- ½ cup crushed Butterfinger bars
Chocolate Coating
- 8 oz chocolate bark or chocolate chips (for dipping)
Optional Toppings
- Crushed candy
- Sprinkles
- Flaky salt
Instructions
- Blend the Base: Combine peanut butter and softened unsalted butter in a mixing bowl. Beat with a mixer until the mixture is smooth and creamy, ensuring a well-blended base.
- Add Flavor and Structure: Stir in the vanilla extract thoroughly. Gradually add the powdered sugar to the mixture, mixing continuously until fully incorporated and the batter has a firm but pliable consistency.
- Fold in Crunchy Bits: Add graham cracker crumbs and crushed Butterfinger bars into the peanut butter mixture. Use a spatula or wooden spoon to fold these in gently but thoroughly, distributing the crunchy elements evenly throughout the dough.
- Roll and Chill: Scoop about 1 to 1½ tablespoons of the dough and roll into small balls with your hands. Place the balls on a parchment-lined baking sheet. Freeze them for 30 minutes to firm up, making them easier to dip.
- Melt the Chocolate: In a microwave-safe bowl, melt the chocolate bark or chips by heating at 50% power in 30-second intervals. Stir well between intervals to ensure smooth, even melting and avoid burning.
- Dip and Decorate: Dip each chilled ball into the melted chocolate, letting the excess drip off. Transfer the coated balls onto a clean tray lined with parchment paper. Sprinkle optional toppings such as crushed candy, sprinkles, or flaky salt over the top if desired.
- Let Set: Allow the chocolate coating to harden at room temperature. To speed the process, you can place the tray in the fridge until the chocolate is firm and set.
Notes
- Use a good-quality peanut butter without added oils for best texture.
- To crush Butterfinger bars, place them in a sealed plastic bag and gently crush with a rolling pin or heavy pan.
- Chocolate bark melts faster and can be easier to work with than chocolate chips.
- Store Butterfinger Balls in an airtight container in the refrigerator for up to one week.
- For a dairy-free version, substitute butter with a plant-based spread and choose dairy-free chocolate.
